
Google App Engine is cloud computing technology for developing and hosting web applications in Google-managed data centers. It virtualizes applications across multiple servers and data centers. And the good things is Google App Engine offer you a trial for free. And offer reasonable price if you have over quota. It is $0.12/GByte for outgoing bandwidth.
So what will you achieve if your site using Google App Engine to host your static files? Google data store are spread all over the world. And if you store your static files on Google App Engine, it will maximize your website speed and performance, since it will serve static files from the nearest location for your visitor. And the results are reduce your CPUs load and memory usage, save bandwidth, and speed up your website performance.
So what is static files? Static files include css files, javascript files, and images files. These files won’t change so much (not dynamic). So it’s better if you serve this static files from outside your server. Because if you have more than 5K visitors/day, it will eat your CPU load, memory and bandwidth just to serve this static file over and over. So host your static files on another server, and better if you use CDN (Content Delivery Network) server. And Google App Engine is one of them, and offer you a free trial. The free trial is enough if you have traffic less than 10k impressions per day (more or less).
Google App Engine Setup step by step
- First you have to have a Google account, if not registered it first, mobile phone verified need.
- Sign up for a Google App Engine Application, go to http://code.google.com/appengine/. Mobile phone verified might be needed again.
- Create a Google App Engine Application:
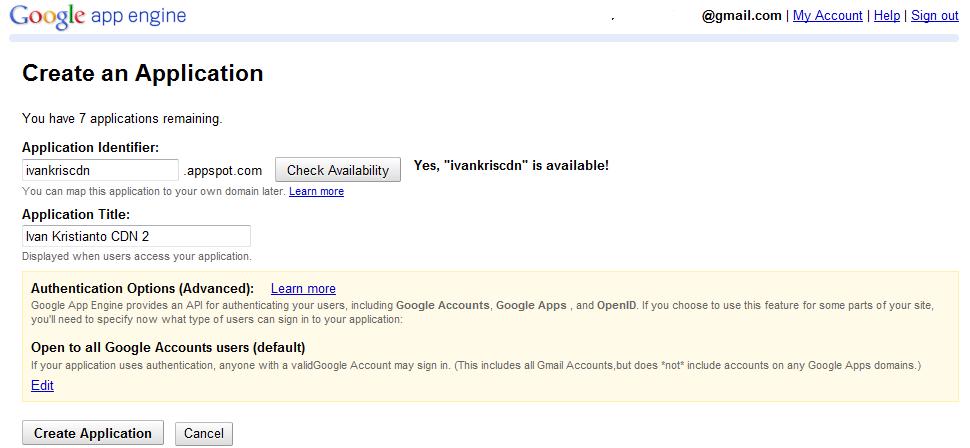
- Now download Python and Google App Engine SDK. (Download available at the end of this article.)
- Install both Python and Google App Engine SDK.
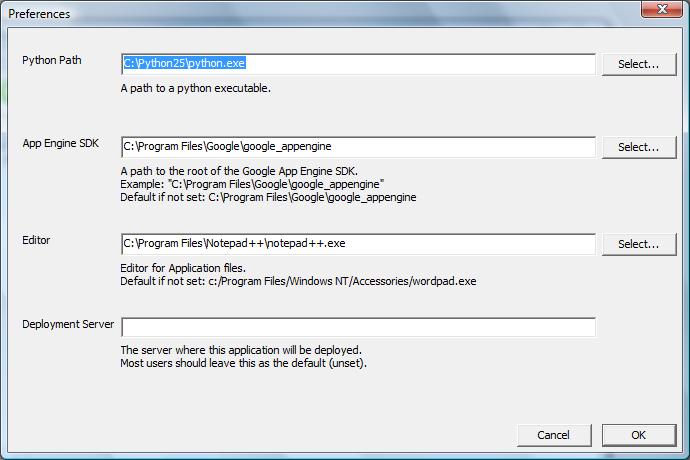
- Open Google App Engine Launcher, you might need to configure it for the first time. Go to Edit Preferences.
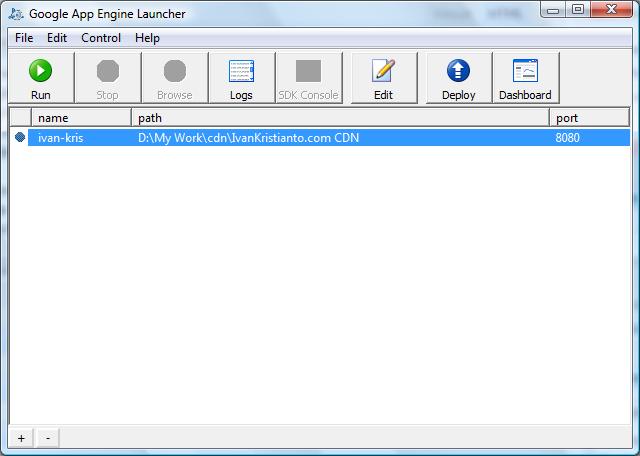
- Create new application, File > Create New Application, Fill Application Name (should be same as Application identifier when you create the app engine), then choose where your file will be saved.
- After you create the application, then now you need to edit the app.yaml file. Mine looks like this:
application: ivan-kris
version: 1
runtime: python
api_version: 1
default_expiration: "7d"
handlers:
- url: /images
  static_dir: images
- url: /styles
  static_dir: styles
- url: /static
  static_dir: static
Explanation: default_expiration means how long the static file will expire on the visitor’s browser cache. Then I created 3 static directories: images, styles and static. For more information go to Python Application Configuration.
- Now go to your application directory and create the folder that you define in app.yaml. For my configuration I will create images, styles and static directories.
- Copy your static files into the directory. Don’t forget to change your css file to get the images url to: http://[app-id].appspot.com/[images|styles|static].
- Deploy your application, just press the button Deploy on the toolbar.
- Update your website themes to get the css style from Google App Engine.
- Test your website, maybe you need a couple of tweaks. Firebug Firefox Extension highly recommended for this.
- It’s all done.
My result after using Google App Engine and couple optimization is:
The home page loading is 6.23s (onload: 6.27s) – tested using Google Page Speed tools.
The home page loading is 4.590s – tested using WebPageTest.
So how about yours? Post your result in my comment. Cheers and good luck.