I just bought a new desktop computer and an original Windows 7 DVD with license. But after a while I realized that my old DVD ROM doesn’t fit into my new motherboard since my new motherboard doesn’t support a parallel ATA connector. It only supports a SATA connector for both hard drive and optical drive. So after I assembled my PC, it was time to install the Windows 7 OS. Since I don’t have a SATA optical drive, I couldn’t install Windows 7 with the DVD. So I had to come to another solution — install it from a USB flash drive.
To install Windows 7 from USB flash drive, follow these steps:
1. First get another PC or laptop and connect the flash drive.
2. Format the flash drive, see picture below (click to enlarge):
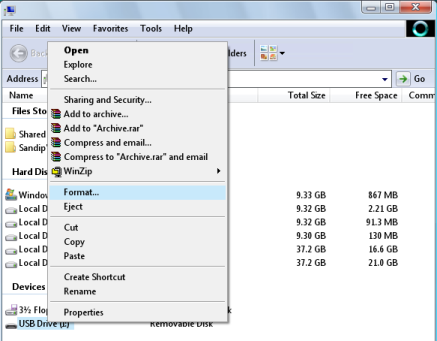
3. If you are using Windows Vista, then you can format your flash drive into NTFS format, but if you cannot, format into FAT32 for now.
4. If you formatted with FAT32 filesystem then follow this step; if already in NTFS filesystem skip this step. Open your command prompt and type:
convert i: /fs:ntfs(Where “I” is your USB drive letter)
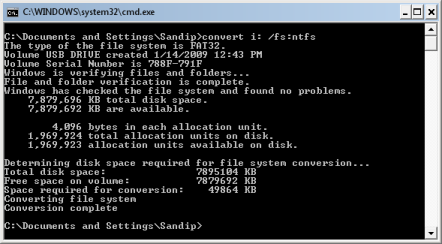
5. Now insert your Windows 7 DVD and still in command prompt, go to your DVD drive letter, in my case it is J:
cd J:6. Then go to the boot folder:
cd bootthen type this command:
bootsect /nt60 Y:(Y is the drive letter of your USB drive)
7. Now copy all files from the Windows 7 DVD into your flash drive.
8. Now your flash drive is Windows 7 bootable. Just plug it into the PC that you want to install and boot from the USB flash drive.
9. Follow the Windows 7 installation wizard and finish.
Enjoy the new experience with Windows 7.