For these past couple of weeks there have been a lot of changes on my blog. Starting from being suspended because of high traffic, moving to another hosting server and then optimizing the blog with caching to improve performance, and changing themes to optimize for Internet Explorer. Since then I have been doing a lot of backups before doing anything.
I made a script to backup all files and database and upload to HotFile, you can read that post here. And now I rent another hosting server to mirror my website. So if something happens with this host, I just repoint my nameserver and it would be up again. Yes, since I got suspended from the old host, I have become a backup freak.
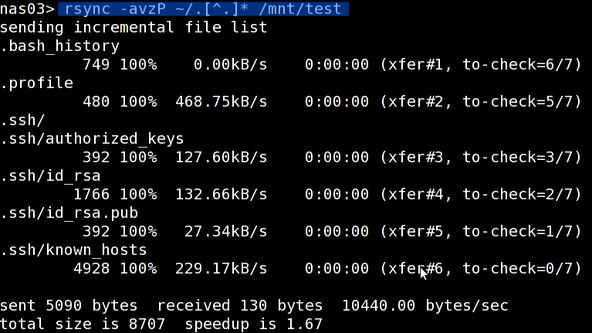
So to mirror your website content, you can use rsync. This useful program can copy all your files over SSH between Linux or Unix servers.
Okay, now let’s prepare. I give the name CurrentUser, CurrentPassword and CurrentHost for the current server. And RemoteUser, RemotePassword and RemoteHost for the remote server.
Configure Current Server
1. Open your terminal and login to your SSH server.
2. Generate public/private key pairs to allow SSH connection without asking for a password.
$ ssh-keygen -t dsa -b 2048 -f /home/CurrentUser/cron/CurrentHost-rsync-key
Generating public/private dsa key pair.
Enter passphrase (empty for no passphrase): [press enter here]
Enter same passphrase again: [press enter here]
Your identification has been saved in /home/CurrentUser/cron/CurrentHost-rsync-key.
Your public key has been saved in /home/CurrentUser/cron/CurrentHost-rsync-key.pub.
The key fingerprint is:
2e:28:d9:ec:85:21:e7:ff:73:df:2e:07:78:f0:d0:a0 thisuser@thishost
3. Copy the .pub file to the RemoteHost.
$ scp /home/CurrentUser/cron/CurrentHost-rsync-key.pub RemoteUser@RemoteHost :/home/RemoteUser/ Now we are done with the configuration on the current host. Now we move to the remote host.
Configure RemoteServer
1. Connect to the remote host with SSH:
$ ssh RemoteUser@RemoteHost
RemoteUser@RemoteHost's password: [RemotePassword]
2. Move the CurrentHost-rsync-key.pub to the .ssh folder:
$ mv CurrentHost-rsync-key.pub .ssh/
cd .ssh/
3. Append CurrentHost-rsync-key.pub to authorized_keys in the .ssh folder:
cat CurrentHost-rsync-key.pub >> authorized_keys 4. Edit the authorized_keys with vim:
vim authorized_keys 5. Change from:
ssh-dss AAAAB3NzaC1kc3MAAAEBAKYJenaYvMG3nHwWxKwlWLjHb77CT2hXwmC8Ap+fG8wjlaY/9t4u
A+2qx9JNorgdrWKhHSKHokFFlWRj+qk3q+lGHS+hsXuvta44W0yD0y0sW62wrEVegz+JVmntxeYc0nDz
5tVGfZe6ydlgomzj1bhfdpYe+BAwop8L+EMqKLS4iSacNjoPlHsmqHMnbibn3tBqJEq2QJjEPaiYj1iP
5IaCuYBhuTKQGa+oyH3mXEif5CKdsIKBj46B0tCy0/GC7oWcUN92QdLrUyTeRJZsTWsxKpRbMliD2pBh
4oyX/aXEf8+HZBrO5vQjDBCfTFQA+35Xrd3eTVEjkGkncI0SAeUAAAAVAMZSASmQ9Pi38mdm6oiVXD55
Kk2rAAABAE/bA402VuCsOLg9YS0NKxugT+o4UuIjyl6b2/cMmBVWO39lWAjcsKK/zEdJbrOdt/sKsxIK
1/ZIvtl92DLlMhci5c4tBjCODey4yjLhApjWgvX9D5OPp89qhah4zu509uNX7uH58Zw/+m6ZOLHN28mV
5KLUl7FTL2KZ583KrcWkUA0Id4ptUa9CAkcqn/gWkHMptgVwaZKlqZ+QtEa0V2IwUDWS097p3SlLvozw
46+ucWxwTJttCHLzUmNN7w1cIv0w/OHh5IGh+wWjV9pbO0VT3/r2jxkzqksKOYAb5CYzSNRyEwp+NIKr
Y+aJz7myu4Unn9de4cYsuXoAB6FQ5I8AAAEBAJSmDndXJCm7G66qdu3ElsLT0Jlz/es9F27r+xrg5pZ5
GjfBCRvHNo2DF4YW9MKdUQiv+ILMY8OISduTeu32nyA7dwx7z5M8b+DtasRAa1U03EfpvRQps6ovu79m
bt1OE8LS9ql8trx8qyIpYmJxmzIdBQ+kzkY+9ZlaXsaU0Ssuda7xPrX4405CbnKcpvM6q6okMP86Ejjn
75Cfzhv65hJkCjbiF7FZxosCRIuYbhEEKu2Z9Dgh+ZbsZ+9FETZVzKBs4fySA6dIw6zmGINd+KY6umMW
yJNej2Sia70fu3XLHj2yBgN5cy8arlZ80q1Mcy763RjYGkR/FkLJ611HWIA= CurrentUser@CurrentHost
To:
from="10.1.1.1",command="/home/RemoteUser/cron/validate-rsync" ssh-dss AAAAB3Nza
C1kc3MAAAEBAKYJenaYvMG3nHwWxKwlWLjHb77CT2hXwmC8Ap+fG8wjlaY/9t4uA+2qx9JNorgdrWKhH
SKHokFFlWRj+qk3q+lGHS+hsXuvta44W0yD0y0sW62wrEVegz+JVmntxeYc0nDz5tVGfZe6ydlgomzj1
bhfdpYe+BAwop8L+EMqKLS4iSacNjoPlHsmqHMnbibn3tBqJEq2QJjEPaiYj1iP5IaCuYBhuTKQGa+oy
H3mXEif5CKdsIKBj46B0tCy0/GC7oWcUN92QdLrUyTeRJZsTWsxKpRbMliD2pBh4oyX/aXEf8+HZBrO5
vQjDBCfTFQA+35Xrd3eTVEjkGkncI0SAeUAAAAVAMZSASmQ9Pi38mdm6oiVXD55Kk2rAAABAE/bA402V
uCsOLg9YS0NKxugT+o4UuIjyl6b2/cMmBVWO39lWAjcsKK/zEdJbrOdt/sKsxIK1/ZIvtl92DLlMhci5
c4tBjCODey4yjLhApjWgvX9D5OPp89qhah4zu509uNX7uH58Zw/+m6ZOLHN28mV5KLUl7FTL2KZ583Kr
cWkUA0Id4ptUa9CAkcqn/gWkHMptgVwaZKlqZ+QtEa0V2IwUDWS097p3SlLvozw46+ucWxwTJttCHLzU
mNN7w1cIv0w/OHh5IGh+wWjV9pbO0VT3/r2jxkzqksKOYAb5CYzSNRyEwp+NIKrY+aJz7myu4Unn9de4
cYsuXoAB6FQ5I8AAAEBAJSmDndXJCm7G66qdu3ElsLT0Jlz/es9F27r+xrg5pZ5GjfBCRvHNo2DF4YW9
MKdUQiv+ILMY8OISduTeu32nyA7dwx7z5M8b+DtasRAa1U03EfpvRQps6ovu79mbt1OE8LS9ql8trx8q
yIpYmJxmzIdBQ+kzkY+9ZlaXsaU0Ssuda7xPrX4405CbnKcpvM6q6okMP86Ejjn75Cfzhv65hJkCjbiF
7FZxosCRIuYbhEEKu2Z9Dgh+ZbsZ+9FETZVzKBs4fySA6dIw6zmGINd+KY6umMWyJNej2Sia70fu3XLH
j2yBgN5cy8arlZ80q1Mcy763RjYGkR/FkLJ611HWIA= CurrentUser@CurrentHost
Setup on the remote server is done. Now you can test it from your current server — try running this command:
$ rsync -avz -e "ssh -i /home/CurrentUser/cron/CurrentHost-rsync-key" RemoteUser@RemoteHost:/remote/dir/backup /this/dir/backup Setup Cron
1. Create a bash file called backup-rsync.sh
2. Copy this script:
#!/bin/sh

RSYNC=/usr/bin/rsync
SSH=/usr/bin/ssh
KEY=/home/CurrentUser/cron/thishost-rsync-key
RUSER=RemoteUser
RHOST=RemoteHost
RPATH=/remote/dir
LPATH=/this/dir/

$RSYNC -az -e "$SSH -i $KEY" $RUSER@$RHOST:$RPATH $LPATH
3. Register to cron (I run it once a week):
crontab -e
0 0 * * 0 bash /path/to/backup-rsync.sh
To run on another schedule see the cron manual by using man crontab for more details.
Troubleshooting:
1. Check the permissions. On the current host, the private key file should be chmod 600. And on the remote host, the authorized_keys should be chmod 600.
2. Check the log files in the /var/log directory.
3. Verbose the rsync command to see where the command goes wrong:
$ rsync -avvvz -e "ssh -i /home/CurrentUser/cron/CurrentHost-rsync-key" RemoteUser@RemoteHost:/remote/dir/backup /this/dir/backup