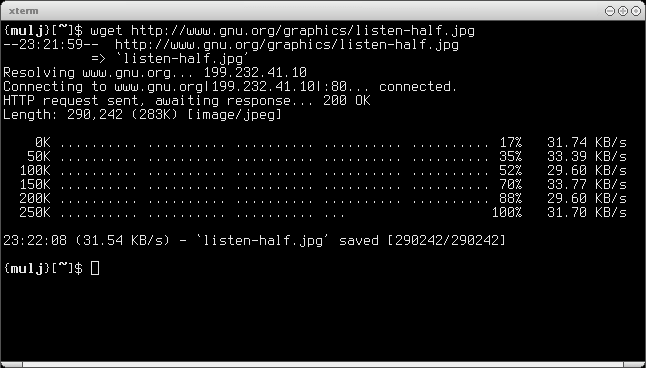
Wget is a free utility for non-interactive download of files from the web. Wget is distributed under the GNU General Public License which is capable of downloading files and supports HTTP, HTTPS and FTP, and even supports HTTP proxy. Wget is natively built for Linux CLI (command line interface) so it can be easily scheduled with cron jobs.
Wget is one of my favorite tools. It has incredibly features, is lightweight, easy to use, and it just works. Wget can transfer files between servers easily and fast. And it is a CLI script, so I can use it from SSH on the server. I can remotely backup the whole directory with just one line command.
Wget command format:
wget [option]... [URL]...Frequently used options:
-V or –version: Display the version of Wget.
-h or –help: Print a help message describing all of Wget’s command-line options.
-b or –background: Go to background immediately after startup. If no output file is specified via the -o, output is redirected to wget-log.
-o logfile or –output-file=logfile: Log all messages to logfile. The messages are normally reported to standard error.
-a logfile or –append-output=logfile: Append to logfile. This is the same as -o, only it appends to logfile instead of overwriting the old log file. If logfile does not exist, a new file is created.
-q or –quiet: Turn off Wget’s output.
-v or –verbose: Turn on verbose output, with all the available data. The default output is verbose.
-i file or –input-file=file: Read URLs from a local or external file. If – is specified as file, URLs are read from the standard input. (Use ./- to read from a file literally named -.)
-O file or –output-document=file: The documents will not be written to the appropriate files, but all will be concatenated together and written to file. If – is used as file, documents will be printed to standard output, disabling link conversion. (Use ./- to print to a file literally named -.)
-c or –continue: Continue getting a partially-downloaded file. This is useful when you want to finish up a download started by a previous instance of Wget, or by another program.
-Q quota or –quota=quota: Specify download quota for automatic retrievals. The value can be specified in bytes (default), kilobytes (with k suffix), or megabytes (with m suffix).
–user=user or –password=password: Specify the username user and password password for both FTP and HTTP file retrieval. These parameters can be overridden using the –ftp-user and –ftp-password options for FTP connections and the –http-user and –http-password options for HTTP connections.
–proxy-user=user or –proxy-password=password: Specify the username user and password password for authentication on a proxy server. Wget will encode them using the “basic” authentication scheme.
–ftp-user=user or –ftp-password=password: Specify the username user and password password on an FTP server. Without this, or the corresponding startup option, the password defaults to -wget@, normally used for anonymous FTP.
-r or –recursive: Turn on recursive retrieving.
-l depth or –level=depth: Specify recursion maximum depth level depth. The default maximum depth is 5.
-m or –mirror: Turn on options suitable for mirroring. This option turns on recursion and time-stamping, sets infinite recursion depth and keeps FTP directory listings. It is currently equivalent to -r -N -l inf –no-remove-listing.
Basic Wget usage:
wget http://domain.com/file.tar.gzResume downloaded file:
wget -c --output-document=filename.zip "http://domain.com/filetodownload.zip"Copy whole directory with FTP:
wget -r ftp://username:[email protected] #or
wget -m ftp://username:[email protected]
There are lots of ways to use wget, but that’s basically what I frequently use. If you have more tips and tricks feel free to leave a comment below. Thanks and good luck.
Download and install Wget:
In Ubuntu or Debian:
apt-get install wgetIn CentOS or Fedora:
yum install wgetDownload link:
http://ftp.gnu.org/gnu/wget/